Do you dream of having a lush, vibrant lawn that will be the envy of your neighbors? The secret to achieving that lies in one essential step: preparing your soil for sod. But how exactly do you go about it? In this guide, we will reveal the step-by-step process of preparing your soil to ensure your sod has the best possible chance of thriving. Get ready to transform your yard into a stunning oasis of green.
Key Takeaways:
- Preparing the soil for sod is crucial for a healthy and resilient lawn.
- Proper soil preparation improves drainage, reduces the risk of weeds and pests, and creates a nutrient-rich environment.
- Key steps include killing existing vegetation, tilling the soil, removing debris, amending the soil, and applying starter fertilizer.
- Grading and leveling the soil is important to ensure proper drainage and sod installation.
- Once the soil is prepared, laying the sod properly and providing sufficient water is crucial for successful establishment.
The Importance of Soil Preparation for Sod
Proper soil preparation is crucial for the success of your sod installation project. By taking the time to prepare the soil before laying the sod, you are setting the foundation for a healthy and vibrant lawn. There are several key benefits to soil preparation that will ensure your sod has the best possible chance of thriving.
1. Strong Root Establishment
When you prepare the soil for sod, you create an optimal environment for root growth. By loosening the soil and removing any obstructions, you make it easier for the sod roots to penetrate and establish themselves. This strong root system will anchor the sod to the ground and allow it to take up vital nutrients and moisture from the soil.
2. Nutrient-Rich and Well-Drained Soil
Soil preparation helps create a nutrient-rich environment for your sod. By adding organic matter, such as compost or peat moss, you can improve the fertility of the soil and provide essential nutrients for the sod’s growth. Additionally, proper soil preparation ensures that the soil is well-drained, preventing waterlogged conditions that can lead to root rot and other issues.
3. Reduced Risk of Weeds, Diseases, and Pests
Preparing the soil for sod helps to minimize the risk of weed infestations, plant diseases, and pest problems. By removing existing vegetation and any weed seeds, you can reduce competition for resources and prevent the spread of weeds. Additionally, removing debris and properly grading the soil can eliminate standing water that attracts pests and creates a conducive environment for diseases.
4. Improved Water Retention and Reduced Watering
Proper soil preparation improves water retention in the soil, allowing it to hold moisture for longer periods. This means that your sod will require less frequent watering, reducing water waste and lowering your water bills. By ensuring the soil is well-prepared and well-drained, you create a balance that allows for adequate moisture without excessive saturation.
By recognizing the benefits of soil preparation for sod and taking the time to prepare your soil properly, you are setting the stage for a successful and flourishing lawn. The next section will outline the step-by-step process for preparing your soil for sod installation.
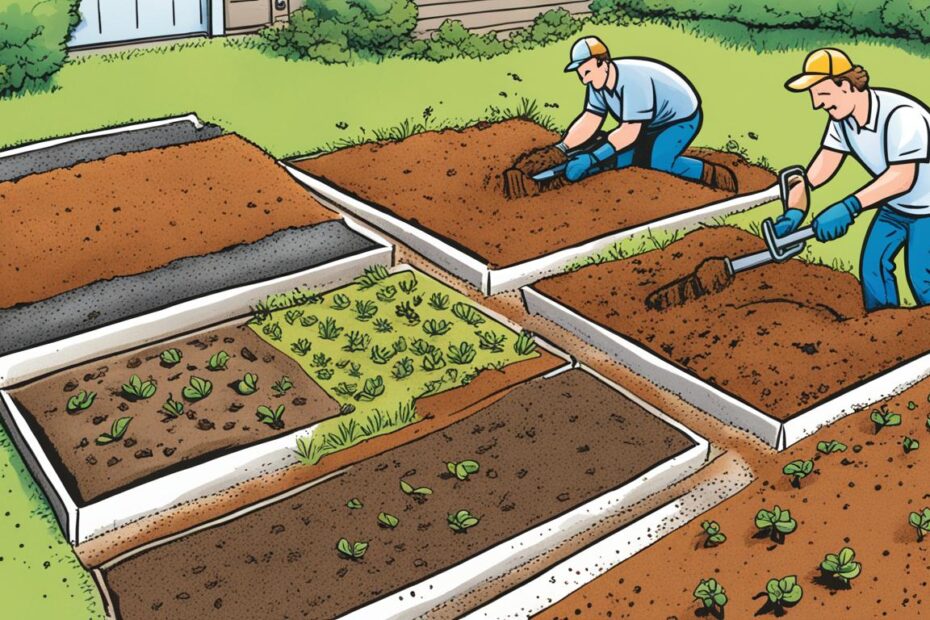
Steps for Soil Preparation
Preparing your soil for sod is a crucial step in ensuring a healthy and vibrant lawn. Follow these steps to properly prepare your soil for sod installation.
- Kill existing vegetation
To start, remove any weeds or old grass that may be present in the area where you plan to lay sod. You can use a glyphosate-based weed killer to effectively eliminate unwanted vegetation.
- Till the soil
Loosening the soil is essential for improving drainage and enabling better root penetration. Use a shovel or rototiller to till the soil, breaking up any compacted areas.
- Remove debris and level the soil
To create a smooth and even surface, rake away any debris such as rocks, sticks, or clumps of soil. Level the soil carefully to ensure that the sod will lay flat and make good contact with the ground.
- Amend the soil
Adding compost, sand, and other soil amendments can greatly improve soil fertility and structure. Conduct a soil test to identify any specific deficiencies or imbalances, and then follow the recommendations to amend the soil accordingly.
- Apply starter fertilizer
Prior to laying the sod, it is important to provide essential nutrients for the establishment of the sod. Apply a starter fertilizer according to the manufacturer’s instructions, ensuring an adequate nutrient supply for the newly installed sod.
By following these steps, you will prepare the soil effectively for sod installation. The careful preparation of the soil sets the stage for a lush and thriving lawn.
CLICK HERE TO CHECK OUR RECOMMENDED PRODUCTSGrading and Leveling the Soil
Proper grading and leveling of the soil are crucial for the successful installation of sod. By ensuring a smooth and even surface, you can prevent water pooling and promote optimal drainage, which is essential for the health of your lawn. It is recommended to use a grading rake to establish a gentle slope away from buildings and other structures, as this will prevent water from accumulating near your property.
Additionally, it is important to fill in any low spots and remove any high spots in the soil to achieve a level surface. This will ensure that the sod lays flat and makes good contact with the soil, allowing for proper root establishment and growth.
Proper grading and leveling not only contribute to the aesthetic appeal of your lawn but also play a significant role in its overall health and longevity. By taking the time to grade and level the soil before laying sod, you are setting a solid foundation for a beautiful and resilient lawn.

Benefits of Proper Grading for Sod:
- Prevents water pooling and drainage issues
- Promotes even lawn growth
- Reduces the risk of uneven terrain
- Enhances the overall appearance of your yard
CLICK HERE TO CHECK OUR RECOMMENDED PRODUCTSProper grading and leveling of the soil create a seamless, healthy foundation for your sod, ensuring that your lawn can thrive and flourish.
Installing the Sod
Now that you’ve prepared the soil, it’s time to start laying the sod. Follow these steps to ensure a successful sod installation process:
- Begin by laying the first row of sod against a straight edge, such as a fence or sidewalk. This will provide a clean and neat starting point for your lawn.
- Stagger the seams of the sod as you lay each piece. This will create a more stable surface and prevent any visible lines from forming. Make sure to butt the edges tightly together for a seamless appearance.
- After each row is laid, use a sod roller to remove any air pockets and ensure good soil contact. This will help the sod establish roots more effectively.
- Continue laying the sod row by row, following the same pattern of staggering the seams and using the sod roller. Take your time to ensure each piece is properly aligned and tightly connected.
- Once all the sod is installed, thoroughly water the entire area to help settle the soil and promote root growth. This initial watering is crucial for the sod’s success.
- For the first week after installation, avoid walking on the sod to allow for proper root establishment. This will give the sod the best chance to integrate with the soil and start growing.
By following these steps, you can achieve a professional-looking lawn with a successful sod installation. Now, let’s take a look at a quote from a professional landscaper on the importance of proper sod installation:
“Installing the sod correctly is essential for establishing a healthy lawn. It’s crucial to ensure good soil contact, as well as proper alignment and seamless connections between each piece of sod. Taking the time to do it right will result in a beautiful, lush, and long-lasting lawn.” – John Smith, Professional Landscaper
Remember, the key to a successful sod installation is precision and attention to detail. Properly laying the sod will set the stage for a thriving and vibrant lawn.

Conclusion
Preparing your soil for sod is a crucial step in creating a thriving lawn. By following this comprehensive sod preparation guide, you can ensure that your sod has the best possible chance of success.
Proper soil preparation plays a vital role in improving drainage, creating a nutrient-rich environment, and reducing the risk of weeds and pests. It all starts with testing your soil to understand its composition and pH levels, allowing you to make the necessary amendments such as adding compost, sand, or fertilizers.
Don’t forget the importance of grading and leveling the soil, which helps with water flow and ensures the sod lays flat. By adhering to proper installation techniques, like staggering the seams and providing good soil contact, you can help the sod establish its roots and create a lush, vibrant lawn.
So, whether you’re a seasoned gardener or a newbie looking to transform your yard, taking the time to prepare your soil for sod will pay off in the long run. With the right preparation and care, your lawn will become a stunning oasis, providing you and your family with a beautiful outdoor space to enjoy for years to come.
FAQ
Why is soil preparation important for sod?
Soil preparation is important for sod because it provides a strong foundation for the roots to establish, ensures the soil is nutrient-rich and well-drained, reduces the risk of weeds and pests, improves water retention, and creates a healthier and more resilient lawn.
How do I prepare the soil for sod?
To prepare the soil for sod, follow these steps: 1) Kill existing vegetation using a glyphosate-based weed killer. 2) Loosen the soil by tilling it with a shovel or rototiller. 3) Remove debris and level the soil to ensure a smooth surface. 4) Amend the soil with compost, sand, and other recommended amendments. 5) Apply a starter fertilizer for essential nutrients.
Why is grading and leveling the soil important for sod installation?
Grading and leveling the soil is important for sod installation because it creates a smooth and even surface, prevents water pooling, ensures proper drainage, and allows the sod to lay flat with good soil contact.
How do I grade and level the soil for sod?
To grade and level the soil for sod, use a grading rake to establish a gentle slope away from buildings and other structures. Fill in low spots and remove high spots to achieve a level surface.
How do I install the sod?
To install the sod, start by laying the first row against a straight edge. Stagger the seams of the sod and butt the edges tightly together. Use a sod roller to remove air pockets and ensure good soil contact. After installation, water the sod thoroughly and avoid walking on it for the first week to allow for proper root establishment.